A broken sprinkler head is a fast DIY fix. This guide covers everything you need to replace one yourself and stop it from breaking again next mowing season.
⏱ 10 min read · Last updated September 2026
Ken Kwiatkowski
Founder of GRASSHOLE Corporation & inventor of the Sprinkler-Guard
Veteran. Florida homeowner who got tired of replacing the same broken sprinkler heads every season. Featured by Kevin Harrington (from Shark Tank). Recipient of the JMI 30 Award. Manufactures in Bradenton, Florida.
Full disclosure: GRASSHOLE Corporation manufactures the Sprinkler-Guard discussed in this guide. Our recommendations come from years of field testing and customer feedback.
Table of Contents
- Why Sprinkler Heads Break in the First Place
- What You’ll Need Before You Start
- How to Replace a Sprinkler Head (Step-by-Step)
- Mistakes That Turn a Simple Fix into an All-Day Problem
- How a Sprinkler-Guard Stops This from Repeating
- Cost Over Time: Repair vs. Protect
- When to Call a Pro Instead
- The Bottom Line
Replacing a sprinkler head is a straightforward DIY fix. You dig out the old head, unscrew it from the riser, thread on the new one, and test the system. Parts run $3 to $30 depending on the brand. The harder thing is figuring out why it broke in the first place — and making sure the mower doesn’t clip the new one next mowing season.
Why Sprinkler Heads Break in the First Place
If you’ve replaced one head, you’ll probably replace another. Lawn mowers are the top culprit, but they’re not the only one.
The mower blade gets closer than you think
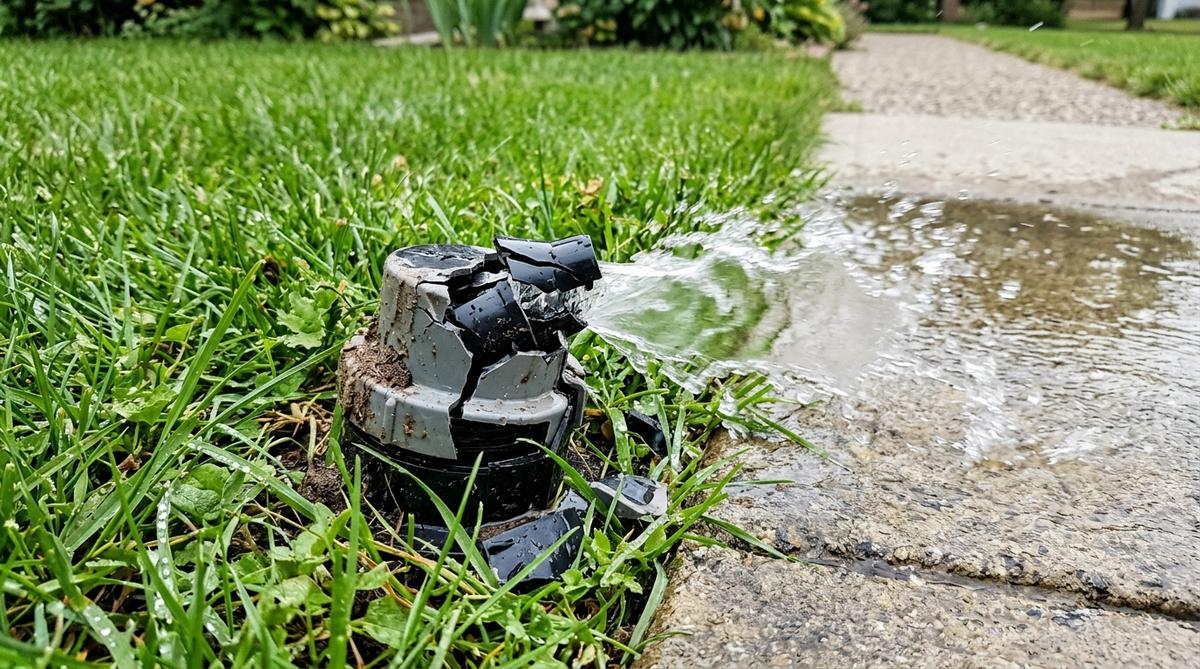
Most homeowners assume mowers clip sprinkler heads because the head is sticking up too high. That’s sometimes true. The more common scenario is that the mower’s wheel rolls over the head first, pushing it sideways at just the wrong angle, and the blade catches the cap on the next pass. You hear that crunch sound and your stomach drops.
According to LawnLove, professional sprinkler head replacement runs $59 to $150 per head installed, plus a service call fee. If you have a yard with dozens of heads and a mower that doesn’t always miss them, that adds up fast.
Foot traffic and settling
Sprinkler heads also break from plain old weight — a heavy boot landing wrong, or a vehicle running too close to the lawn edge. Over time, the soil settles around the head and tilts it out of alignment. Once a head is leaning, the mower is even more likely to clip it on the next pass.
The old head was already at end of life
Per HomeGuide, quality sprinkler heads last 10-15 years when properly maintained. Mower damage, freezes, and mineral buildup can all shorten that lifespan. If your system is over a decade old, a cracked head may be the first sign that others are close behind. Worth noting when you’re out there digging.
A single broken sprinkler head can waste up to 25,000 gallons of water per year, per EPA WaterSense. Fixing a cracked head isn’t just about the grass — it’s about your water bill too.
What You’ll Need Before You Start
Get these together before you turn off the water. Most of it is already in your garage.
| Item | Where to get it | Why you need it |
|---|---|---|
| Replacement sprinkler head (match brand/model) | Hardware store or irrigation supplier | Must thread onto your existing riser |
| Small flat-head screwdriver | Your toolbox | Adjusting nozzle direction and arc |
| Trowel or hand shovel | Garage | Clearing soil around the broken head |
| Work gloves | Anywhere | Soil and sharp plastic edges |
| Old rag or towel | Indoors | Catching water when you unscrew the head |
Matching the replacement head matters more than most people think. Write down the brand and model number from the old head before you head to the store — or photograph it with your phone. Rain Bird, Hunter, and Orbit all use different thread profiles. Cross-brand swaps sometimes work, but they often create slow drip leaks at the connection. Same model if you can get it.
How to Replace a Sprinkler Head (Step-by-Step)
Total time needed: about 10 minutes.
- Step 1: Shut off the irrigation zone
Turn off the specific zone at your controller, or shut off the main water supply to the irrigation system if you're not sure which zone controls that head. Never replace a head with water still flowing to the line. Even low pressure will make the riser spin when you try to unscrew the head, and you'll lose parts into the pipe.
- Step 2: Dig out the head
Use a trowel to clear the soil around the head — go out a few inches in all directions and down to where the riser sits. You need room to grip the head body and turn it. The head threads directly onto a riser, which is a short plastic pipe section sticking up from the lateral line. That connection is what you're unscrewing.
- Step 3: Unscrew the old head
Grip the head body — not the nozzle cap — and turn counterclockwise. If it hasn't been touched in years, it may be stiff. Wrap a rag around the body for better grip. Once it breaks free, keep turning until the head comes off the riser. Set it aside.
- Step 4: Flush the riser and thread on the new head
Before threading on the new head, turn the zone on briefly — just a few seconds — to flush any grit out of the open riser. Debris in the riser is the most common reason a brand-new head sprays poorly right out of the gate. Wipe the riser threads clean with your rag, then spin the new head on clockwise by hand until it feels snug. Give it one more quarter-turn. Do not over-tighten — the riser is plastic and will crack at the connection. Snug is enough.
- Step 5: Test and adjust
Turn the zone back on and let it run a full cycle. Watch for water spraying from the base of the head (loose connection), the head failing to pop up (too little pressure — check for a kink in the lateral line), or a spray pattern that's off. Use a flat-head screwdriver to adjust the arc per the manufacturer's instructions on the head body or the packaging it came in.
Mistakes That Turn a Simple Fix into an All-Day Problem
Most sprinkler head replacements go fine. A handful of small mistakes make them go sideways.
Buying the wrong replacement head
This happens more than people admit. You grab the first box that looks close at the hardware store, get home, and the threads don’t match. Best case: you return it and add a second trip. Worst case: you force it and crack the riser, which is a bigger repair than the head itself.
Always photograph the old head’s brand name and model number before you leave.
Not clearing enough soil
If you try to unscrew the head while it’s still packed tight in soil, you’re fighting friction the whole time. The extra few minutes of digging saves real frustration. You also need to see the riser threads clearly before threading on the new head — you can’t do that if you’re working in a hole the size of a coffee cup.
Skipping the line flush
Skipping the five-second flush before threading the new head on is the most common reason a fresh replacement sprays weakly or spins poorly. Grit in the nozzle clogs the deflector and throws off the pattern. Flush it, then install.
Replacing without protecting
Here’s the pattern a lot of Sun Belt homeowners fall into: replace the head, mow a few weeks later, clip it again, replace it again. Nothing changes. Per LawnStarter, DIY sprinkler head replacement parts run $3 to $30 per head. That’s manageable once. It adds up when you’re doing it every season because the cause was never addressed.
The actual fix isn’t just the replacement. It’s stopping the next one.
How a Sprinkler-Guard Stops This from Repeating
Once you’ve done the replacement, this is the move most homeowners skip — and then regret the next mowing season.
The Sprinkler-Guard by GRASSHOLE drops over the replacement head in about 30 seconds, no tools. It’s made from Flexible Advance ABS with UV Deterrent and sits flush with the lawn surface so the mower wheel rolls right over the guard’s flange. The sprinkler head pops up through the center opening to water normally, then retracts below the guard when the cycle ends.
If the mower clips the area, the guard absorbs the impact. The head underneath keeps watering.
The 20-pack covers a standard residential yard and runs $125 at Sprinkler-Guard.com. That’s roughly the cost of two pro service calls for a single head replacement each.
| Protection method | Upfront cost | Holds up to mower? | Inhibits grass growth? | Install time |
|---|---|---|---|---|
| No protection | $0 | No | No | None |
| Concrete donut | A few dollars each | Partially | No | Several minutes |
| PVC pipe DIY | Low (varies) | Poorly | No | More involved |
| Sprinkler-Guard | $6.50/head | Yes | Yes | 30 seconds |
The guard also inhibits grass from growing over the head, which is its own separate problem as heads start to sink over time. If you’re dealing with that too, the post on how to stop grass from growing over sprinkler heads covers that side of things.
500+ five-star ratings from homeowners backs up what the concept sounds like on paper. I put these on every head in my yard a couple years back. The mower rolls right over without incident every time.
Cost Over Time: Repair vs. Protect
| Scenario | Year 1 | Year 5 |
|---|---|---|
| Pro repair, unprotected (at $59-$150/head per LawnLove) | One service call | Multiple calls |
| DIY parts only (at $3-$30/head per LawnStarter) | Minimal | Adds up over seasons |
| Sprinkler-Guard 20-pack | $125 one-time | $125 total |
The math speaks for itself. One season of pro repairs covers most of the cost of protecting every head in the yard permanently.
When to Call a Pro Instead
DIY replacement works well in the vast majority of cases. A few situations are worth handing to a professional.
Call a pro if: The riser itself cracked or pulled loose from the lateral pipe — that’s a pipe repair, not just a head swap, and it may require digging up a section of lateral line. Also call if the zone loses pressure across multiple heads after the replacement (that’s usually a valve or mainline issue, not the head). And if you’re seeing standing water in one area even when the zone is off, you may have a pipe leak downstream — get eyes on it before you assume it’s just a slow-draining head.
For a single broken pop-up head with a solid riser and normal zone pressure, the DIY fix is the right call every time. The parts are cheap and the job is fast.
Frequently Asked Questions
**DIY parts run $3 to $30 per head** depending on the brand and model, per [LawnStarter](https://www.lawnstarter.com/blog/cost/sprinkler-repair-price/). Professional installation costs $59 to $150 per head, per [LawnLove](https://lawnlove.com/blog/sprinkler-repair-cost/), plus any service call fee. For most homeowners with a trowel, the right replacement head, and an afternoon free, DIY is the clear value play.
No. You only need to shut off the irrigation zone that controls that head. Find the zone number at your controller, turn it off, and you're clear to work. If you can't identify the zone, shutting off the main irrigation supply works too — it just means no other zones can run while you work.
Photograph or write down the brand and model number on the old head before going to the store. The brand name is usually molded into the head body — Rain Bird, Hunter, Orbit, and Toro are the most common. Thread sizes are not universal across brands, so matching the existing head is the safest move for a leak-free connection.
**Quality sprinkler heads last 10-15 years** with proper maintenance, per [HomeGuide](https://homeguide.com/costs/sprinkler-head-replacement-cost). Mower damage, freezes, and soil settling can all shorten that lifespan significantly. If your system is a decade or older, a cracked head is often the first sign that others are nearing end of life.
No. The Sprinkler-Guard has a 3.5" inner opening that allows the head to extend, rotate, and retract exactly as designed. The guard sits around the base of the head — not above the nozzle. Water flow, arc, and radius are unchanged after installation.
The 3-inch Sprinkler-Guard fits any pop-up head up to 3" across — Rain Bird, Hunter, Orbit, Toro, and most standard pop-ups. If you have larger rotor heads, the 5-inch Sprinkler-Guard is sized for those. Check sizing at [Sprinkler-Guard.com](https://sprinkler-guard.com) if you're not sure which fits your system.
Mowers and trimmers are the top cause — either the blade clips the cap directly or the wheel pushes the head sideways before the blade gets there. Foot traffic, vehicle overruns, and soil settling over time are the other common causes. Once a head is leaning out of alignment, mower damage is more likely on every subsequent pass. For the full breakdown, see the post on [why sprinkler heads keep breaking](https://grassholesystem.com/sprinkler-heads-keep-breaking/).
**Yes.** A single broken head can waste up to 25,000 gallons of water per year, per [EPA WaterSense](https://www.epa.gov/watersense/sprinkler-spruce-up). If your system runs several times a week through summer, a cracked cap that goes unnoticed for a few months costs you on the water bill before you ever see the damage in the grass. Fix it promptly when you spot it.
The Bottom Line
Replacing a broken sprinkler head is genuinely a manageable fix once you’ve done it once. Dig it out, unscrew it, flush the riser, thread on the right replacement, test. The whole thing is faster than most people expect.
The harder thing is breaking the replace-and-repeat cycle. If your mower clipped one head, it’ll find another. Drop a Sprinkler-Guard on the head you just replaced and walk the rest of the yard while you’re at it. You’ve already done the repair — don’t hand the same service call back to the mower next season.
If you want to protect every head before the next mow, the guide on how to protect sprinkler heads from lawn mowers covers the whole-yard approach.
Not sure? The Sprinkler-Guard ships in 10/20/30/60-packs. If one ever takes too much abuse, you swap just that one in 30 seconds — no full system to replace.
Shop Sprinkler-Guard
- Starting at $64.99 for a 10-pack
- Free shipping on orders over $100
- 500+ five-star ratings from homeowners on Amazon
- Made in the USA by a Veteran-Owned Business in Bradenton, Florida
- Patented design — featured by Kevin Harrington (from Shark Tank)
- No tools required — installs in 30 seconds per head
- One-by-one swap design — if a guard takes too much abuse, swap just that one
Last updated: September 2026. Statistics sourced from EPA WaterSense, Johns Hopkins Medicine, LawnStarter, LawnLove, HomeGuide, IBISWorld. Product specifications and pricing current as of publication date.