

How to Winterize Your Sprinkler System (Complete Guide)

How to Winterize Your Sprinkler System (Complete Guide)
If you live anywhere that gets a hard freeze in winter, this is the most important sprinkler maintenance task of the entire year. Skip it, and you’ll be replacing cracked pipes, broken valves, and shattered sprinkler heads the following spring. Do it right, and your system will be ready to go when the weather warms up.
Winterization isn’t complicated. The whole job is removing the water from the system before it has a chance to freeze and expand. But there are a few different ways to do it, some better than others, and there are a few common mistakes that turn a 30-minute job into a $500 repair project.
Here’s everything you need to know.
Why Winterization Matters
Water expands when it freezes. About 9% by volume. That doesn’t sound like much, but in a sealed system like an irrigation line, that expansion has nowhere to go. Something has to give.
What gives, in order of how often we see it: PVC fittings crack, copper pipes split at the elbows, brass valves fracture, sprinkler heads burst, and backflow preventers get destroyed. Any of these is an expensive repair. All of them are completely preventable with one trip outside before the first hard freeze.
A typical sprinkler system repair after winter damage runs anywhere from $200 for a single broken valve to $2,000+ for a system with multiple line breaks. Winterization, by contrast, costs $0 to $100 depending on whether you do it yourself or hire a pro.
Where Winterization Is and Isn’t Necessary
If you’re in Florida, south Texas, southern Arizona, or anywhere else where the temperature rarely drops below freezing, you can usually skip winterization. The risk of freeze damage in those areas is low enough that most homeowners just leave their systems alone year-round.
If you’re north of about the I-10 corridor, you need to winterize. That includes most of the Sun Belt outside south Florida, most of the southeastern US, and obviously everything farther north. Even one night of sustained sub-freezing temperatures can cause damage.
If you’re not sure whether your area gets cold enough, look up your USDA hardiness zone. Anything zone 8 or colder needs winterization. Zone 9 is borderline (occasional freezes). Zone 10 and warmer usually doesn’t.
When to Winterize
The right time is “before the first hard freeze of the season.” That’s a moving target depending on where you live.
For most of the southern US, that means sometime in November or early December.
For the central US, mid-October to early November.
For the northern US, early to mid-October.
Don’t wait too long. The first freeze can come earlier than expected, and if you wake up to ice on the ground and your system still has water in it, you may already have damage.
If you’re not sure, check the long-range forecast and winterize when you see consecutive nights below 32°F coming in the next week or two.
The Three Methods of Winterization
There are three basic ways to remove water from a sprinkler system. They’re not all created equal.
Method 1: Manual Drain (Easiest, Least Reliable)
If your system was designed with manual drain valves, you can simply open them and let gravity pull the water out of the lines. This works on systems where the lines are pitched downhill toward the drain valves.
The problem is that most modern systems aren’t designed this way. And even on systems that are, the manual drain method leaves water trapped in the heads, the valves, and any low spots in the lines that can’t drain naturally.
If you have manual drain valves and you’re in a borderline climate (occasional light freezes), this method might be enough. In a real cold zone, it’s not reliable.
Method 2: Automatic Drain (Better, Still Has Limits)
Some systems have automatic drain valves at the low points of each zone. When water pressure drops below a certain level, the valves open and let water out.
This is better than manual drain because it doesn’t require you to remember to open anything. But it has the same fundamental problem: water can still be trapped in heads, fittings, and any spot where the line doesn’t pitch downhill.
Automatic drains are an improvement, not a complete solution.
Method 3: Compressed Air Blowout (Best, Most Reliable)
This is the method most pros use and the one we recommend for any system in a real cold zone. You connect a compressor to the system and blow compressed air through each zone, pushing all the water out through the heads.
Done correctly, this removes essentially all the water from the system. No trapped pockets, no water in the heads, no risk of freeze damage.
The downside is that you need a real compressor (not a tire pump), and there’s a right way and a wrong way to do it. We’ll cover the details below.
How to Do a Compressed Air Blowout
Here’s the step-by-step process for the air blowout method.
What You’ll Need
- An air compressor capable of producing enough CFM (cubic feet per minute) for your system. Most residential systems need 20 to 50 CFM. A small pancake compressor is not enough. You typically need a wheeled tow-behind or a large stationary compressor. Hardware stores rent them.
- A blowout adapter to connect the compressor to your sprinkler system. These cost about $15 and screw onto the same fitting where you’d attach a hose.
- Eye protection. Compressed air can launch water and debris at high speed.
- Your sprinkler controller, manual.
Step 1: Shut Off the Water Supply
Find the main water supply valve to your sprinkler system. This is usually inside the house or in a basement, not at the backflow preventer. Shut it completely.
Open the bleed valves on your backflow preventer to release the pressure in the lines.
Step 2: Connect the Compressor
Attach the blowout adapter to the system. The connection point varies by setup, but it’s typically downstream of the backflow preventer and upstream of the zone valves. Your system should have a designated blowout port. If you’re not sure where it is, consult your system’s installation manual or have a pro show you the first time.
Step 3: Set the Pressure Correctly
This is where most DIY winterization goes wrong. You want enough pressure to push the water out, but not so much that you damage the system.
For PVC systems: do not exceed 50 PSI. For polyethylene systems: do not exceed 80 PSI.
Most controllers and pipes are rated higher than this, but you want a safety margin. Higher pressures can damage valves, fittings, and seals over time.
Step 4: Start the Controller and Run Each Zone
With the compressor running and pressurizing the system, manually activate the first zone on your controller. The compressed air will push water out through every head in that zone. You’ll see the heads pop up and spray for a few seconds, then sputter, then puff out air with a bit of mist, then nothing.
When the zone stops spitting water and is just blowing dry air, shut off that zone and move to the next one.
Run each zone for 1 to 2 minutes. Don’t run any zone longer than that without water flowing through it. The compressed air alone (no water for cooling) can damage the sprinkler head bodies if you run too long.
Step 5: Repeat for Every Zone
Work through every zone in the system. Some zones may need a second pass after you’ve done all of them once, especially zones with low spots that hold water. If a zone still spits water on the second pass, give it a third.
Step 6: Shut Down the Controller
Once every zone has been blown out, set the controller to “off” or “rain mode” so it doesn’t try to run during the winter. Some controllers have a specific winterization setting. Otherwise, just turn it off.
Leave the manual drain valves and bleed valves on the backflow preventer in the open position to ensure no water is trapped.
Common Winterization Mistakes
A few things people get wrong that lead to spring damage.
Using a small compressor. A pancake compressor or a tire inflator can’t push enough volume to actually clear the lines. The compressor needs to keep up with the volume of the system. Rent a real one.
Running too high a pressure. More pressure does not mean better blowout. It means more risk of damaged valves and fittings. Stay at or below the pressure ratings above.
Running zones too long without water. The water flowing through the head cools the plastic. Once the water is gone, running compressed air for too long can heat the head and warp it. Move on once the zone is dry.
Forgetting the backflow preventer. Backflow preventers can be damaged by freezing water just like the rest of the system. Make sure you’ve drained or blown out the backflow assembly, not just the lines downstream of it.
Not turning off the water supply. If the main supply is still open, water just refills the lines as fast as you blow them out. Always shut off the supply first.
DIY vs Hiring a Pro
Most homeowners can winterize their own system if they’re willing to rent a compressor and learn the process. The first time, it takes about an hour. After that, 30 minutes.
The cost of DIY is the compressor rental, usually $50 to $80 for a half day.
The cost of hiring a pro is typically $75 to $150 depending on system size and location. Many irrigation companies offer fall winterization as a routine service. If you don’t want to deal with the compressor or you’re not confident in the process, this is money well spent.
Spring Startup Reminder
Winterization is half the cycle. The other half is starting the system back up correctly in the spring. Don’t just turn the water back on in March and walk away.
Spring startup involves slowly re-pressurizing the system, walking each zone to check for damage, and cleaning out any debris that accumulated over the winter. We have a separate guide on spring startup if you want the full process.
How to Make Spring Startup Easier
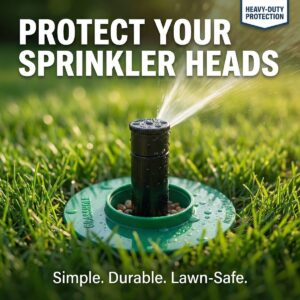
The single biggest factor in how easy your spring startup goes is whether your heads are still in good shape after the winter. Heads that were already damaged or sunken in the fall will have problems in the spring.
A protector around each head helps in two ways. First, it physically shields the head from any winter damage from frost heaving, falling branches, or accidental contact. Second, it keeps the head visible so you can find it easily during winterization (you can’t blow out a head you can’t find).
For homeowners in cold climates, installing protection in the fall before winterization is one of the smartest things you can do. It pays off the moment spring arrives.
Frequently Asked Questions
When should I winterize my sprinkler system?
Winterize before the first hard freeze of the season, typically in October or November depending on your climate. Don’t wait until you see freezing temperatures in the forecast. Get it done while you still have warm weather.
Can I winterize my sprinkler system without a compressor?
If your system has manual drain valves and you live in a borderline climate, maybe. In a real cold zone, no. Compressed air blowout is the only reliable way to remove all the water from the system, and you need a real compressor (not a tire pump) to do it.
How much does it cost to winterize a sprinkler system?
DIY costs about $50 to $80 for a compressor rental. Hiring a pro typically runs $75 to $150 depending on system size. Compared to the cost of repairing freeze damage (often $500 to $2,000 or more), winterization is one of the best ROI maintenance tasks you can do.
What happens if I don’t winterize my sprinkler system?
Water trapped in the lines, valves, heads, or backflow preventer can freeze and expand, cracking pipes, breaking valves, and destroying heads. The damage usually isn’t visible until you turn the system back on in the spring, at which point you have a much bigger repair bill.
How long does it take to winterize a sprinkler system?
A typical residential system takes 30 minutes to an hour, depending on the number of zones. The first time you do it, allow extra time to figure out the process. After that it’s a quick fall task.
Want a year-round playbook for keeping your lawn in shape? Grab our free guide, The Perfect Lawn: 12 Things You Need to Know to Achieve a Beautiful Lawn. Seasonal tips that actually make a difference.
Related Articles
- Read more: our spring lawn care checklist
- Read more: protecting sprinkler heads from damage
- Read more: what sprinkler repairs cost
- Read more: how to adjust sprinkler heads
Written by Ken Kwiatkowski, founder of Sprinkler-Guard and U.S. Army veteran. Protecting sprinkler systems since 2019.
Want More Tips Like This?
We put together a free guide called Outside Home Maintenance Tips to Save $1,000+ a Year that covers sprinkler maintenance, seasonal checklists, and the common mistakes that cost homeowners hundreds every year. No sales pitch, just practical stuff.
Comment LAWN on our Facebook page to get your free copy.
Sprinkler-Guard. Made in the USA. Veteran-owned. Patented.