300+ 5-Star Reviews | Free Shipping on Orders over $50!
(Excludes Alaska & Hawaii)

300+ 5-Star Reviews | Free Shipping on Orders over $50!
(Excludes Alaska & Hawaii)

Broken sprinkler head slowing down your lawn care game? No worries! Replacing it is easier than you think, and with Sprinkler-Guard by Grasshole, you can protect your new sprinkler head from future damage. Follow this simple guide to keep your sprinklers in tip-top shape and your lawn looking its best.
Identify the broken sprinkler head that needs replacing, ensuring it’s the one causing issues such as leaks, uneven water distribution, or failure to pop up.
Carefully remove the grass and dirt around the sprinkler head using a small garden trowel and your hands. Dig a hole about 6 inches deep and 12 inches in diameter around the sprinkler head, being cautious not to puncture the water line. Place the dirt on a piece of plywood or in a container for easy replacement and to keep dirt out of the water line.
Inspect the water line for any damage that may have occurred while digging.
First, ensure all dirt and debris are cleared away where the sprinkler head attaches to the water line. Then, carefully unscrew the old sprinkler head from the riser by turning it counterclockwise, using a good pair of channel-lock pliers or regular pliers.
Wrap the threads of the new sprinkler head with seal tape or Teflon tape to ensure a tight seal. Flush out any dirt or debris that may have fallen into the water line. Screw the new sprinkler head into place by turning it clockwise, tightening by hand until secure, and positioning it in the desired direction.
Turn on your sprinkler system to check for any leaks. Tighten the sprinkler head as needed to ensure it’s fully secured and functioning properly.
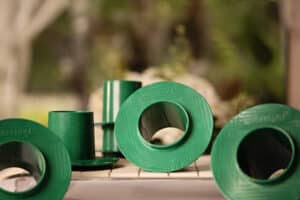
Partially backfill the hole with dirt, then add a Sprinkler-Guard by Grasshole to protect your sprinkler head from future damage. Backfill around the Sprinkler-Guard, making sure the disc is level with the ground. The sprinkler head should sit about 1/8 to 1/4 inch below the top of the Sprinkler-Guard.
Finally, fill the inside of the Sprinkler-Guard with small pea stone, leaving the sprinkler head fully exposed and ready for use.

Now you’ve got a shiny new sprinkler head and a Sprinkler-Guard by Grasshole to keep it safe from harm. With these easy steps, you’re set for years of worry-free watering! Your lawn will thank you, and so will your sprinklers.